

Contents
hide
一.确认服务器环境信息
操作系统版本:CentOS Linux release 7.9.2009 (Core)
内核版本:3.10.0-1160.25.1.el7.x86_64
openssh当前版本:OpenSSH_7.4p1
openssh升级版本:openssh-9.1p1
openssl当前版本:OpenSSL 1.0.2k-fips
openssl升级版本:openssl-1.1.1s
二.安装依赖库
①.直接用yum源安装依赖库
yum -y install gcc gcc-c++ glibc make autoconf openssl openssl-devel pcre-devel pam-devel三.安装telnet
(1).安装telnet-server
yum -y install xinetd telnet-server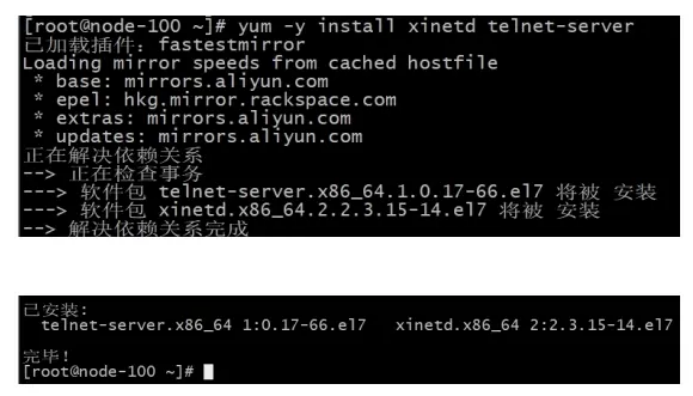
(2).配置telnet
先看一下xinetd.d目录下是否有telnet文件
[root@node-100 ~]# ll /etc/xinetd.d/telnet
如果有,则将文件里面的disable = no改成disable = yes
如果没有,就进行下面的操作
cat  /etc/xinetd.d/telnet
[root@node-100 ~]# cat > /etc/xinetd.d/telnet <<EOF
service telnet
{
disable = yes
flags = REUSE
socket_type = stream
wait = no
user = root
server = /usr/sbin/in.telnetd
log_on_failure += USERID
}
EOF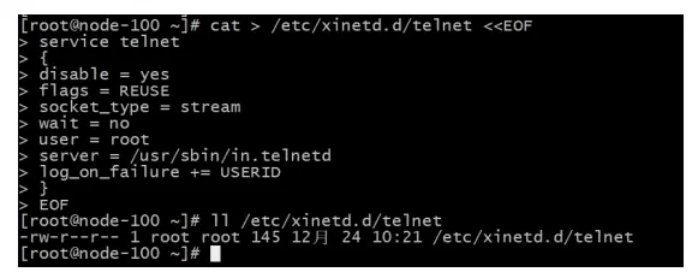
(3).配置telnet登录终端类型
#配置telent登录终端类型
cat  /etc/securetty
[root@node-100 ~]# cat >> /etc/securetty <<EOF
pts/0
pts/1
pts/2
pts/3
pts/4
pts/5
EOF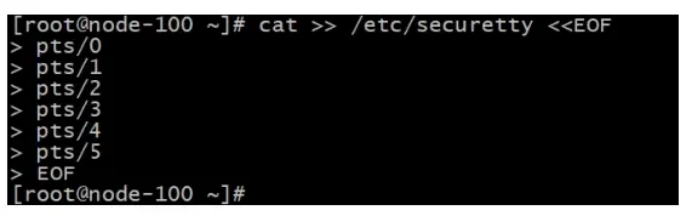
(4).启动telnet
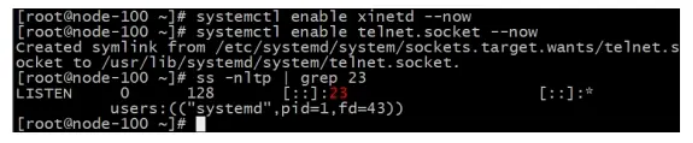
[root@node-100 ~]# systemctl enable xinetd --now
[root@node-100 ~]# systemctl enable telnet.socket --now
[root@node-100 ~]# ss -nltp | grep 2323端口有监听的记录则代表telnet正常启动了
1).下载openssh 9.1p
或者如果服务器可以联网则直接
mdkir /root/openssh && cd /root/openssh
wget https://mirrors.aliyun.com/pub/OpenBSD/OpenSSH/portable/openssh-9.1p1.tar.gz
(2).下载openssl 1.1.1s
https://www.openssl.org/source/openssl-1.1.1s.tar.gz
如果服务器可以联网则直接
cd /root/openssh

wget https://www.openssl.org/source/openssl-1.1.1s.tar.gz
五.升级openssl
切换telnet登录服务器
(1).备份老的openssl
[root@node-100 ~]# mv /usr/bin/openssl{,.bak}

[root@node-100 ~]# mv /usr/include/openssl{,.bak}
(2).解压openssl并编译
mkdir /root/openssl && cd /root/openssl
上传下载的openssl1.1.1
tar -zxvf openssl-1.1.1s.tar.gz
cd /root/openssl/openssl-1.1.1s
./config shared && make && make install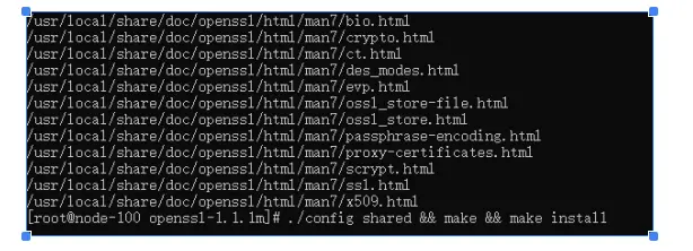
编译完成后,可以在/usr/local目录下找到openssl的二进制文件和目录
[root@node-100 openssl-1.1.1m]#  ll /usr/local/bin/openssl
[root@node-100 openssl-1.1.1m]# ll -d /usr/local/include/openssl/ 
(3).建立软链接
[root@node-100 openssl-1.1.1m]# ln -s /usr/local/bin/openssl /usr/bin/openssl
[root@node-100 openssl-1.1.1m]#ln -s /usr/local/include/openssl/ /usr/include/openssl
[root@node-100 openssl-1.1.1m]# ll /usr/bin/openssl
[root@node-100 openssl-1.1.1m]# ll -d /usr/include/openssl 
(4).重新加载配置,验证ssl版本
echo "/usr/local/lib64" >> /etc/ld.so.conf

/sbin/ldconfig

openssl version
六.升级openssh
(1).备份老的openssh
[root@node-100 ~]# mv /etc/ssh{,.bak}
[root@node-100 ~]# mkdir /usr/local/openssh 
(2).编译并安装openssh
cd /root/openssh/openssh-9.1p1
./configure --prefix=/usr/local/openssh --sysconfdir=/etc/ssh --with-openssl-includes=/usr/local/include --with-ssl-dir=/usr/local/lib64 --with-zlib
make && make install

(3).配置sshd_config文件
echo "UseDNS no" >> /etc/ssh/sshd_config
echo 'PermitRootLogin yes' >> /etc/ssh/sshd_config
echo 'PubkeyAuthentication yes' >> /etc/ssh/sshd_config
echo 'PasswordAuthentication yes' >> /etc/ssh/sshd_config
(4).配置新的sshd二进制文件
#备份sshd和ssh文件
mv /usr/sbin/sshd{,.bak}
mv /usr/bin/ssh{,.bak}
mv /usr/bin/ssh-keygen{,.bak}
#创建新的软链接文件
ln -s /usr/local/openssh/bin/ssh /usr/bin/ssh
ln -s /usr/local/openssh/bin/ssh-keygen /usr/bin/ssh-keygen
ln -s /usr/local/openssh/sbin/sshd /usr/sbin/sshd(5).重启openssh服务
systemctl disable sshd --now
mv /usr/lib/systemd/system/sshd.service{,.bak}
systemctl daemon-reload
cp -a /root/openssh/openssh-9.1p1/contrib/redhat/sshd.init /etc/init.d/sshd #sshd.init的位置视本机的具体位置而定,需要自行查询位置,并更改
cp -a /root/openssh/openssh-9.1p1/contrib/redhat/sshd.pam /etc/pam.d/sshd.pam #sshd.pam的位置视本机的具体位置而定
chkconfig --add sshd
systemctl enable sshd --now
systemctl restart sshd 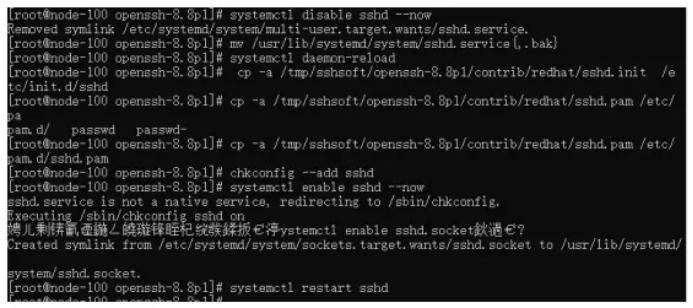
(6).验证Openssh版本
ssh -V
Comments NOTHING